Files, images, and PDFs
Resizing and compression are different operations

“Make the image smaller” can mean fewer pixels or fewer bytes. Check which limit the destination actually imposes before editing.
On this page
Inspect the current file
Record its width, height, format, and file size. Pixel dimensions describe the image grid. File size also depends on the content and encoding, so two images with identical dimensions can have different byte sizes.
Resize for the destination
If the image is only needed in a small display area, reduce its dimensions appropriately. Preserve the aspect ratio unless deliberate stretching is intended. Cropping removes part of the scene; resizing changes the dimensions of the remaining image.
Adjust compression separately
Once the dimensions meet the requirement, compare export quality settings using copies. Look at text edges, gradients, and dark areas. Available controls depend on the selected format. Do not assume that a lower quality setting affects every image equally.
Check the completed version
Confirm dimensions, byte limit, and readability. Open the exported file rather than judging only the editor preview. Keep the original and name the delivery version by purpose or dimensions so later changes can start from a known source.
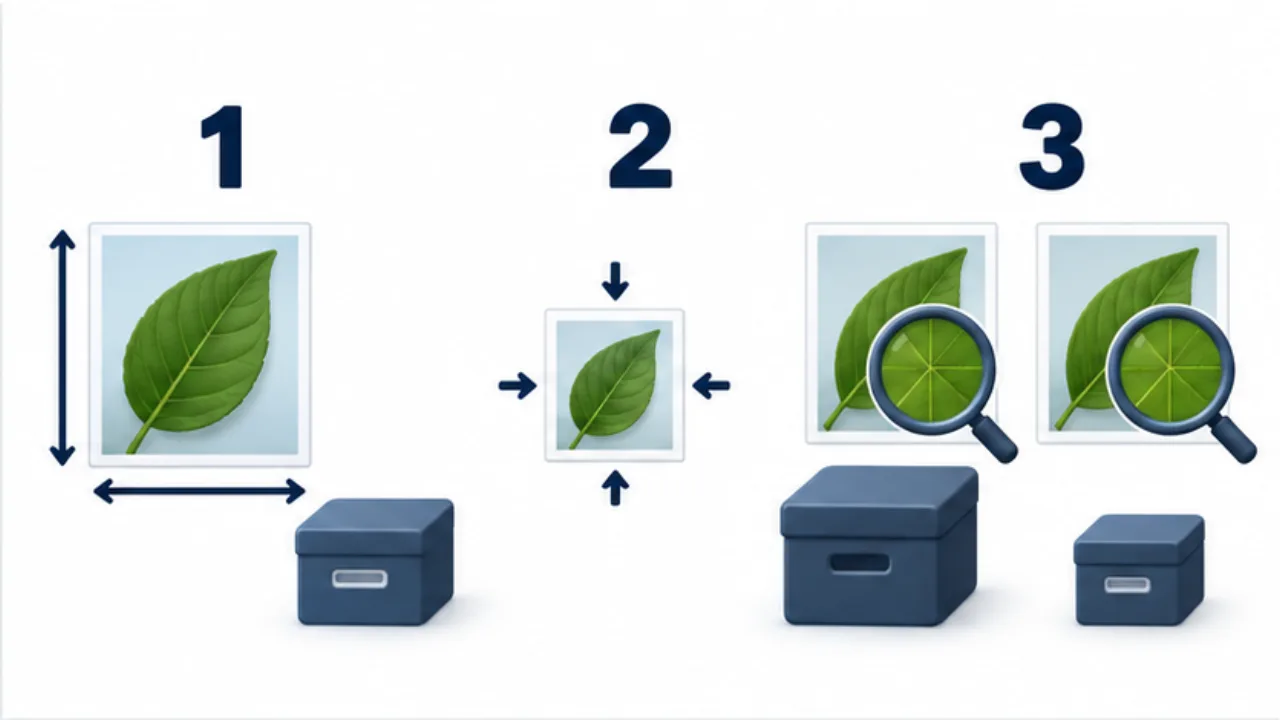
Select the image to enlarge.
- Check width, height, format, and file size first.
- Resize proportionally for the destination’s dimensions.
- Adjust compression on a copy and compare necessary detail.
Understand pixels and bytes in context
Pixels describe the grid that forms the image; bytes describe the stored data. A destination might impose a width limit, a file-size limit, or both. These are separate requirements. The example “no wider than 1200 pixels” is not equivalent to “under 1 MB,” and neither is a universal publishing recommendation.
You also cannot assume that halving width and height will halve the file size. The number of image samples changes, while the encoding result also depends on content. Inspect the exported file instead of estimating acceptance from the percentage you entered.
Displaying an image smaller is another distinct action. A document can show a large source image in a small frame. If the problem is delivery size, inspect the actual file being delivered rather than just its appearance in the editor.
Worked example: preparing a constrained upload
Write down four conditions: dimensions, byte limit, accepted format, and essential visible content. The last condition might be a readable product label or a recognizable facial expression. Without it, the task can turn into reducing quality until an upload happens to pass.
If the source is larger than the task needs, create a suitably sized copy first. Open it and check the essential detail. Then adjust the export format or quality and inspect the resulting file size. Keep a record of the single setting changed between candidates.
If a label becomes unreadable before the file meets the limit, consider a different presentation. A separate close-up or a simpler diagram may communicate the information better than repeatedly compressing the full scene.
Once a candidate meets the constraints, compare the relevant area with the master. Distinguish a cosmetic difference from the loss of information the recipient must use.
Recognize the wrong kind of change
| Result | What to revisit |
|---|---|
| The file fits but the label is unreadable | Detail size or the need for a separate image |
| Faces look stretched | Aspect-ratio settings |
| Information at the edge disappeared | Cropping rather than resizing |
| The upload still fails | The actual selected export's format and byte size |
Names such as “web-width” and “lower-quality” are useful during comparison because they explain what changed. Preserve the source and the chosen result so future edits do not start from an unnecessarily degraded copy.